The Toolbox: Red Eye Remover
The Toolbox is going to be a series of articles in which we go one by one discussing the tools available in iPiccy Photo Editor. We’ll talk about the strengths, weaknesses, and appropriate times to use these tools. Last time we talked about how the Lomo Effect but today we’re talking about how to Red Eye Remover.
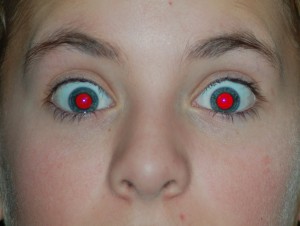
The first thing we should learn is why Red Eye occurs. Simply because if you know why you can prevent it and not even have to learn this tool. The technical explanation from Wikipedia:
In flash photography the light of the flash occurs too fast for the pupil to close, so much of the very bright light from the flash passes into the eye through the pupil, reflects off the fundus at the back of the eyeball and out through the pupil. The camera records this reflected light. The main cause of the red color is the ample amount of blood in the choroid. This nourishes the back of the eye and is located behind the retina.
However, in a more simple terms, it occurs when a flash that occurs close to the camera lens (the case with most compact cameras and smart phones), in low ambient light. However, sometimes this is unavoidable, as you want to capture the moment, but simply don’t have a great setup for it. Well, take the picture, and upload it to iPiccy Photo Editor later, and edit it.
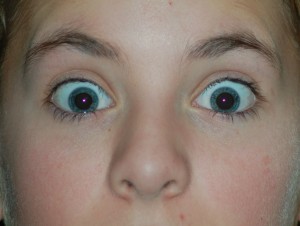
How To Use The Red Eye Remover
Step 1. Upload your photo to iPiccy Photo Editor.
Step 2. Open the third tab at the top, which is the “Retouch Tab”
Step 3. Select the “Red Eye Fix” and then apply to the select eyes
Step 4. Save your work.
Red Eye fixing is a small tool and just scratching the surface. It is a part of a larger tab and group of tools that if you master, you will photo edit on a very efficient and effective level.