Common Photo Mistakes Editing Can Fix
Often, when we capture a photo of a scene. It doesn’t come out exactly how we anticipated or hoped it would.
Luckily, with digital cameras, the power and the magic of editing is at our fingertips. And various software, like iPiccy, are available and ready to help fix common photo mistakes and make our images come to life.
In this article, we’ll cover various common photo mistakes and discuss how to fix them.
(Because every photo is worth saving, after all.)
-
Too Much Noise
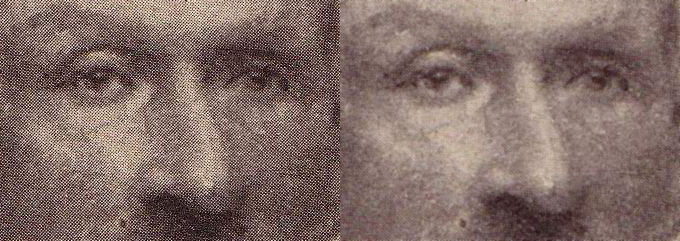
In photographs, noise refers to that messy, grain-like visual distortion and discoloration. It tends to happen when you are shooting in low light or at night time. It can also happen when your ISO is very high. Often, adding noise to your photo is perceived as adding a film grain, and can be done in a creative and unique way. If you’re interested in exploring the idea further, you can visit this website. If you aren’t looking to have noise in your images and are looking to reduce it, you have a few options. You can shoot at a lower ISO setting, check your exposure, shoot in RAW and be careful when you’re doing long exposures.
Though you can use various iPiccy tools to reduce noise. Here’s what to do, based on the website recommendations:
Step 1. Upload your photo to iPiccy Photo Editor.
Step 2. Stay in the basic editing tab and scroll all the way to the bottom, and select “Smart Blur”
Step 3. This is more of a recommendation, but Strength – 4, Blur – 2, Fade – 35 is a good place to start when working with this tool. You will need to adjust according to your own personal needs and requirements though.
Step 4. Save your work. You’re done!
If you’re looking for more information on noise in photographs, you can look here or here for additional information.
-
Blurry Photos

You’ve snapped that amazing scene. The sun is setting, your subject looks incredible, and it’s framed to perfection. But, when you get home and open it in your editing software, the photo is blurry. Blurry photos can happen for a number of reasons (and trust us when we say, we understand your frustration).
What Causes the Blur:
The Subject Moved. If your subject moved while your shutter is open, this can cause certain parts of your image to appear blurry.
The Camera Moved. When your shutter is open, the slightest of movements of your camera can cause the image to become blurry (even pressing the shutter button can cause blur — that’s why some photographers use a shutter release).
The Depth of Field. When it comes to depth of field — if yours is too shallow, this will cause things to be out of focus (and can be altered via your aperture setting).
The Focus. If your image is out of focus, this will cause it to appear blurry. Perhaps some parts of your image are clear. Others are not — your camera has set its focus on an incorrect part of your image (like, say, your subject’s shoes instead of their face).
The Autofocus. If the problem seems to be your autofocus, you always have the option of turning it off and switching to manual.
Check out this tutorial for more information.
How to Fix the Blur:
Sharpness. Sharpness is commonly defined as edge contrast (or, the contrast along edges in a photo). As we increase the sharpness, the contrast along the edges of the photo will increase — and detail will be added.
Clarity. Clarity will give you something different than sharpening. It will increase the contrast in the middle tones of your image (rather than the lightest or darkest parts). In iPiccy, this will recover the dark areas in the photo.
Contrast. When we look at an image, we often perceive contrast as sharpness. So, when we have a blurry image — we can try to hide some of it by increasing our contrast.
Black and White. By converting an image to black and white, we have the option of our eyes perceiving it as sharper than it actually is. Combine black and white filters with contrast to make your image pop.
To fix this issue quickly, use iPiccy tools Blur and Sharpness — and you’ll be good to go.
-
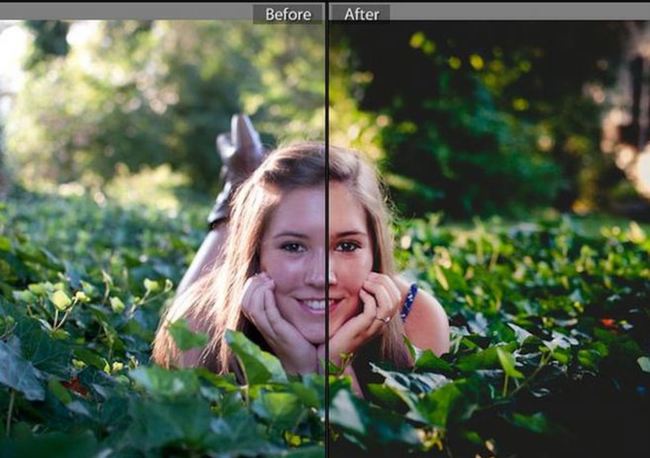
Too Dark or Too Bright

If you’ve taken photos (whether with a phone, point and shoot, or DSLR camera) you’ve more than likely experienced photos that are too dark or too light. This can have to do with a number of technical variables. It might be the ISO, the flash, the exposure, the metering. But, it could also have to do with your weather and your time of day.
When you’re snapping photos outdoors, you are dealing with different types of light. There is both harsh light and soft light. There’s the golden glow that comes just after sunrise and just before sunset, the clouds that cast shade over the image, the bright sun that is shining high in the sky. All of these factors impact the light in your photos. All of these things can cause your end result to perhaps look much darker or lighter than the actual scene you perceived.
So, how do you fix it?
When it comes to a dark image, iPiccy can fix your image by doing an Auto-Tune for you. For underexposed images, in particular, this works like magic.
In iPiccy you can also explore the Exposure tool. This will control your Exposure, Highlights, Shadows and Contrast — which all contribute to the lights and darks of your image.
To learn more about exposure and light / dark photos, take a look at these links: one, two.
-
Wrong Color Balance
In photography, getting the right form of color balance can be one of the most difficult parts of the editing process. It’s that thing that causes your images to look way to yellow or way too blue (and can often change the entire feeling of the scene you are shooting).
To the human eye, most light appears white. However, there are actually different types of light have slightly different colors and digital cameras are sensitive to this.
Fixing the white color balance improves your images if they are casting a glow that is too warm (yellow) or cool (blue). This is one of the most important aspects of photo editing and is something that every professional editing toolbox comes equipped with. For example, tools like Photoshop, Luminar or GIMP have a lot of paid and complicated features, like Color Contrast, Color Temperature, Image Radiance, Bi-Color Toning and so on to work with the colour issues.
That may be confusing and quite expensive for beginners. Mastering the basics on a software like iPiccy (with tools like Light and Contrast, Hue and Saturation and Color Balance) is the best way to start.
If you need more information on colors, you can visit this link.
-
Poor Composition

You can learn about composition here. In short, it is what makes your photo. Where the subject is, what your background is, where you place your foreground and so much more contribute to the overall make up of your photo.
There are 5 basic elements of composition in photography. The Rule of Thirds, Centered Composition and Symmetry, Foreground Interest and Depth, Frame Within a Frame and Leading Lines. You can see a great, detailed tutorial on those elements here or read about 20 techniques that will improve your photos compositionally here. When it comes to poor composition, what often happens is that the focus point of your image isn’t obvious and the viewer’s attention is not drawn in. In this sense, cropping your image can greatly improve the focus or mood of your photos.
Cropping may seem like a simple task. That’s true for the most part. However, there are a lot of tricks that can provide inspiration and help you out.
Here are some tips:
- Leave Space in Front of Your Subject’s Face
- Lead Your Viewers Eyes
- Crop Your Image to Tell a Story
- Crop at Eye Level
- Leave Out Boring Details
- Keep it Consistent
Explore your endless options of creative cropping using iPiccy’s online cropping tools — they’re simple, straightforward and easy to use (read more here: https://ipiccy.com/ft/crop-pictures). They also provide several templates such as Instagram and Twitter/Facebook cover as well as Constraint options.
To read further about cropping, you can visit this tutorial.
-
Perspective Distortion
In photography, perspective distortion is the warping of an object and its surrounding area. It causes the object to look drastically different than what it would look like with a normal focal length. Thus causing the photo’s viewers to have a distorted view of the nearby features, the size and the scale.
If you find your photo distorted in this way (and you didn’t intend it to be) there are certain edits that can be accomplished. This can be difficult. However, if you’re ready, and able to utilize tools like iPiccy, and Photoshop, here is a guide and tutorial links that will help you to correct perspective distortion.
When we capture an image of a particular scene, it often doesn’t appear exactly how we want it to. And that’s okay. Common photo mistakes happen to even the best and most experienced photographers. Luckily, there is stellar image editing software we can rely on to help us craft that perfect photo we’ve been dreaming of.
Author Bio: This post is by Max Therry. He is a writer for PhotoGeeky.