Stitching photos together usually means two things. One is simply creating a collage and adding the photos and having them connect together in a manner to make it seem like one image. The other method is combining two images into one image whether it's to connect and make a larger panorama or to show a contrast between the two photos side by side. In regards to which one is easier, the collage maker is definitely the easier method in which to bring multiple images together into one image. There is even a way to make one image look like it's made up of different images, which is also very easy. The more difficult but also more refined method of combining images is using the Blender Tab.
Stitch Photos Together In Collage Maker In 4 Easy Steps
Let's first talk about the easier way of bringing photos together to form a single image, which would be adding them together in the Collage Maker.
Step 1. Upload your photos to iPiccy's Collage Maker
Step 2. Drop your photos in a layout that you selected
Step 3. Make the small adjustments and move your photos around as you feel necessary.
Step 4. Save your work. You're done!
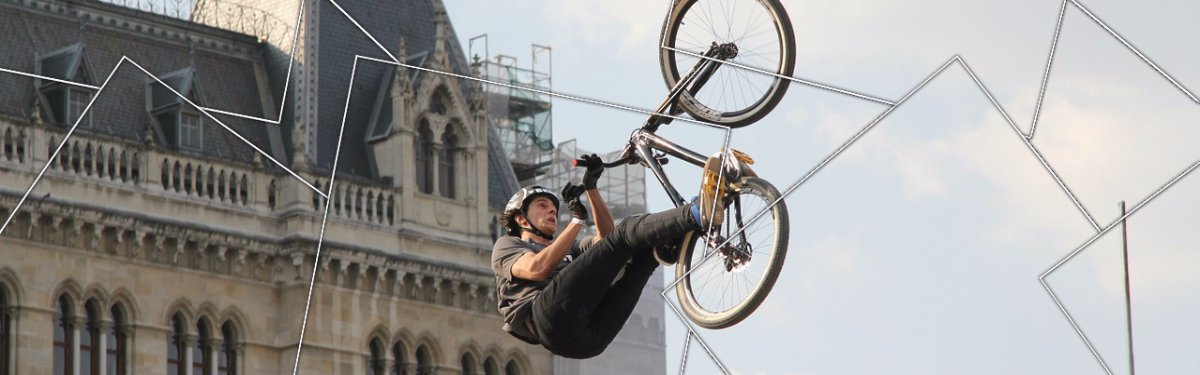
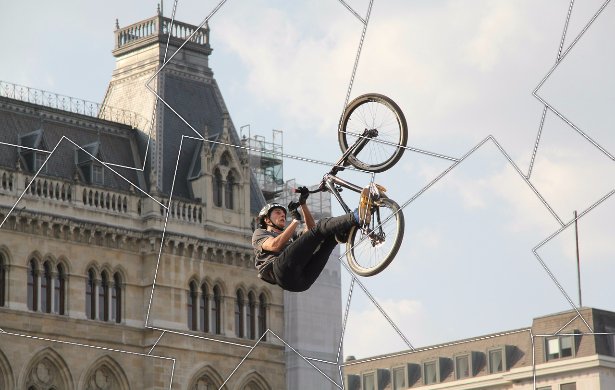
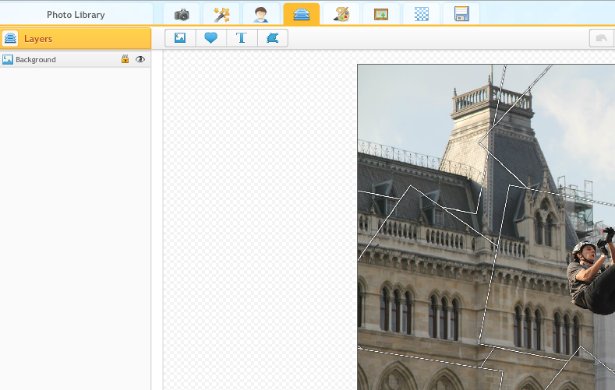
In terms of making a single photo into multiple parts, you'll want to upload your picture to iPiccy and simply apply the "Photo Collage" effect.
Or Combine Photos With The Blender Tab In 5 Steps
The Blender Tab in general is an extremely powerful tool, that has multiple purposes and uses within iPiccy and photo editing in general.

Step 1) Upload your first base image to iPiccy Photo Editor. This is the photo you will want to either be the dominant part of the photo or simply the one you want to work with first.
Step 2) Open the Blender Tab which is the fourth tab at the top.
Step 3) Next, you will need to select the Add Photos tool at the top left. This will require you to enable local storage, which you should and will be very helpful.
Step 4) Once you've added your photo to your storage you can drop it in and edit as necessary with various blender tools. This includes resizing, vector masking, and more. Apply as necessary for your needs in photo stitching.
Step 5) Save your work. You're done!

This will be a process you repeat as necessary depending on how many photos you're stitching together.
When To Photo Stitch
It isn't uncommon to question when you should merge photos or not. It can be a tricky task, and sometimes not worth the time commitment. However, photo stitching can create some really interesting and very cool panoramic shots as well as create nostalgia and add to legendary memories. Stitching photos together can also create great contrasts and really show strengths of opposing pictures and styles. It's just as easily an incredible method for bringing together multiple images that are sometimes better than the sum of their parts. So while photo stitching isn't an every day endeavor to embark on, it's relatively easy and can be done fairly quickly if necessary. So why not make those beautiful memories even better by combining them into one image.