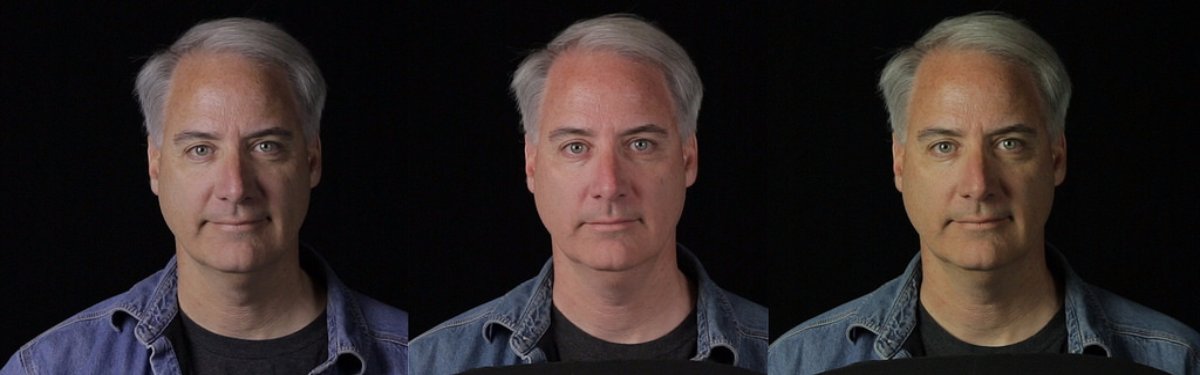
Color correcting is the key fundamental when learning photo editing. So it's absolutely imperative that you have all of the tools you need when color correcting photos. Luckily for all of us, iPiccy Photo Editor has numerous options available for everyone when it comes to color correcting images. That includes tools for adjusting specific and exact things like hue, saturation, and contrast. In addition to that you can adjust the "Curves" which is a method for editing the previously mentioned hue, saturation, and contrast. On top of this, when you add in the color balance, brightness, contrast, and the ability to dodge or burn your images, the options for color correction are numerous and just overall incredible. With all of these options available, there is no reason that you can't color correct exactly to the smallest detail.
Correcting The Color Of A Photo Is The Best Way To Start
Every single photo you take, or anyone takes for that matter, can benefit from color correction. So because color correction is so useful it is a good way to start, because after you finish color correcting, you may find that the picture doesn't need anything else. Color correction has the ability to completely change the complexion, feel, and style of a photo. Having your colors be vibrant and effervescent are obviously going to create a different feeling than softening and dulling your colors. While that seems obvious, it's often quite a surprise how much something like color correction really changes your ideas about an image. This is why it's a great idea to start with color correction, as it'll help you build and progress with your photo editing.
Start Color Correcting In 5 Easy Steps
Because we've mentioned that there are multiple and numerous tools that color correct in iPiccy Photo Editor, we'll just talk about how to start and open them in general, they are all fairly intuitive to play with and once you begin adjusting you will learn quickly what each click will do.
Step 1) Upload your photo to iPiccy Photo Editor
Step 2) Stay in the Basic Editor tab, this is where you'll find all of your color correction tools.
Step 3) Select your chosen color correction tool from almost anywhere on the list of tools in this tab. You'll find curves and levels in the advanced section of this tab, and you'll find hue and saturation in the basic section.
Step 4) Apply and use as necessary for your photo. You should use these tools with a goal in mind though to stay focused and not just randomly change colors.
Step 5) Save your work. You're done!
When To Color Correct
This is kind of a trick situation and answer, because there really is not a time where you should not color correct. It's more or less an absolute essential thing to do when doing any kind of photo editing. I've already mentioned many times how important color correction is and what it can do for you, but it really can't be over stated how much color correction affects photo editing. It is the building block and essential fundamental to know and learn when photo editing. Another benefit it provides is that it can really help you make your goal with any particular edit more clear. When you color correct you bring out the best parts of a photo, you separate the focus from the background, and you get to control all of this by adjusting curves, color levels, hue, saturation, and dodge/burn. So the short answer is ALWAYS COLOR CORRECT!