
Today we have a submission post! This is an very useful guide for creating YouTube Thumbnails by Lisa Smith. Without further ado…
YouTube is one of the best websites that offers you a platform to share your videos with the global audience. Youtube is touted as one of the best online marketing platforms by the entrepreneurs across the world. You need to start by shooting an impressive video that will get your message across to the target audience. But, do you think shooting the video and uploading it is all that you need to enhance the traffic? Well, not really. With the internet world changing at a fast pace, the packaging of your video counts too.
This means you need to use a thumbnail that when clicked leads the user to your content. In short, a thumbnail is a great way to publicize your content on YouTube in an interesting way. Though the website offers you a simple thumbnail it is not really an attractive one. So, with all the competition that you might be facing, you need to design an awesome thumbnail for your YouTube content.
Wondering how to do this? Well, it is as easy as a YouTube banner maker. Here are some easy steps to help you through the process.
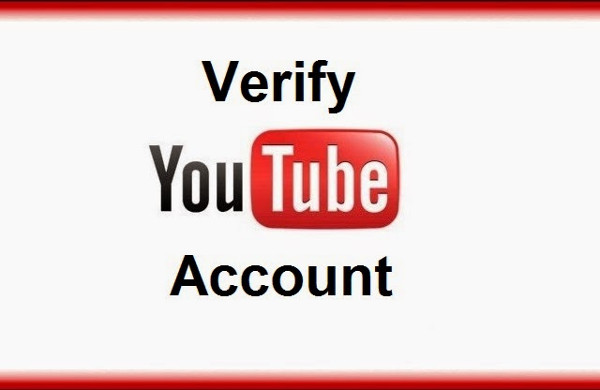
Now that you are attempting to create a YouTube thumbnail, it is apparent that you have an account on the website. However, in order to design a thumbnail, it is important that your account is verified by the website. If this is not the case, you will have to get the verification done before you get started with the whole thumbnail creation process. The verification process is not a complicated one and is majorly handled by the website. You just need to submit some information and the website will verify your account and send you an email.

Once your account is verified, you are all set to begin the process of creating a thumbnail for your YouTube content. So, first things first log into your account using the username and the password. You will be immediately directed to the home page of your account. On the left-hand side of the homepage, you can see a number of options. This will include Home, My Channel, Subscriptions, History, Watch Later etc. Select the My Channel option from these. Clicking on this option will lead you to your channel page and display all the videos that you have shared on the website.
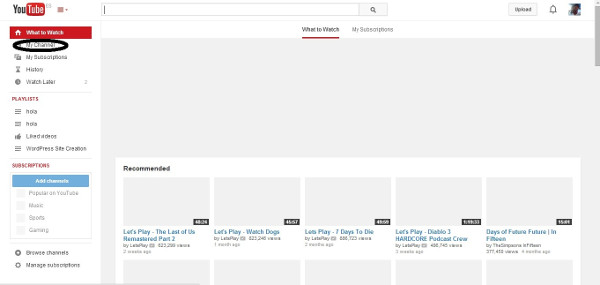
In your My Channel page, you will see the list of all the videos that you have shared with your audience. Along with this, at the top of the page, you will see some options like Subscribers, Views and Video Manager. The Subscribers options give you an idea of the number of people following your channel and the Views gives you a clear data of the number of people who have seen your video. However, these are of no concern when designing thumbnails. Here, you just need to click on the Video Manager option.

As soon as you click the video manager, you would be presented with a list of all the videos that you have shared till date. Now is the time to pick the video for which you are planning to design the thumbnail. You will see that below every video is an Edit tab. So, go ahead and look for the video for which you will be creating the thumbnail. Once you find it, click the Edit tab below it.
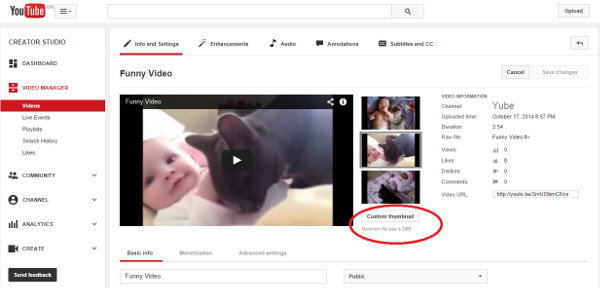
As soon as you click the Edit tab, a new window will open up. Here you will find that YouTube has already generated three different thumbnails for the video. Happy with any of these thumbnails? Select it and set it as the thumbnail for your video. However, if you want to design a new thumbnail for your YouTube content, click on the Custom Thumbnail option that is present below these auto-generated thumbnails.
Here you get an option to use the screen capture tools like the snipping tool to design a thumbnail that will be perfect to go with your video. This is the option if you are working with a PC. In case you are working on a Mac, press Command+Shift+4 to select the part of the screen that you want to capture. When the video reaches the part that you want to capture, hit pause. Use the snipping tool to crop it, copy this and save it. In case you want to get more creative, upload this to iPiccy.com and add a logo or text to it.
After you save the custom thumbnail into your system, the computer will quickly pop open the folder that you most recently used. Browse through the directory to find the folder where you have saved your thumbnail. Select this folder and then click on the Open option.
Opening the folder will automatically impose the thumbnail into your YouTube video’s page. Make sure that you hit the Save Changes tab that is present on the top right-hand corner of the page. As soon as you hit this tab, the thumbnail for the video will change to the one that you just created.
Creating a YouTube thumbnail is really a very simple task. If you get creative, you can actually create a very interesting and attractive thumbnail that will enhance the viewership of your content. So, go ahead and improve your YouTube channel with some custom thumbnails.
![]()
Though there are a number of ways to design a thumbnail for YouTube videos, these methods do need some technical knowhow. iPiccy is a dream come true as it lets them design YouTube thumbnails in a jiffy without much effort.
Here are the steps:
With iPiccy, you really don’t have to be a techie person. This software helps you create a YouTube thumbnail just like that. So, go ahead and try it today.