
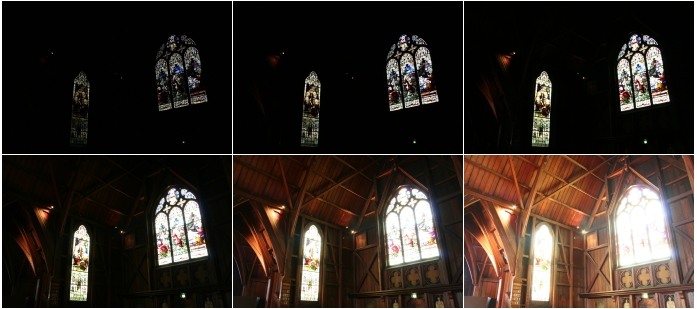
Exposure is another basic photography principle that can make or break your shot. You’ve probably heard something was overexposed or underexposed before. If you’re not familiar with photography, I’m guessing you were quite confused. It’s pretty simple really. Overexposure simply means your photo is really bright. This also means some spots probably lost visibility due to blending in with light/white parts. Underexposure is when it is too dark, and you lose visibility of some parts due to blending in darker areas. This picture should will show you the differences:
Exposure is comprised of three different elements, Aperture, ISO, and Shutter Speed. This quote from cambridgeincolor is simply an excellent example, and I can’t explain it any better:
Achieving the correct exposure is a lot like collecting rain in a bucket. While the rate of rainfall is uncontrollable, three factors remain under your control: the bucket’s width, the duration you leave it in the rain, and the quantity of rain you want to collect. You just need to ensure you don’t collect too little (“underexposed”), but that you also don’t collect too much (“overexposed”). The key is that there are many different combinations of width, time and quantity that will achieve this. For example, for the same quantity of water, you can get away with less time in the rain if you pick a bucket that’s really wide. Alternatively, for the same duration left in the rain, a really narrow bucket can be used as long as you plan on getting by with less water.
In photography, the exposure settings of aperture, shutter speed and ISO speed are analogous to the width, time and quantity discussed above. Furthermore, just as the rate of rainfall was beyond your control above, so too is natural light for a photographer.
So let’s get a little bit deeper into the trinity that determines exposure.
Shutter Speed is the amount of time the camera’s shutter opens (think of it as curtain that opens up and allows the sensor to take in light), more time = more light. Think of this as how long you leave the bucket in the rain.
Shutter speed can do a bunch of cool things. Higher shutter speeds can allow you to capture faster moving objects and make them appear frozen in time. A slower shutter speed will leave the sensor open longer. This sometimes creates motion blur, and this is popularized with light drawing.
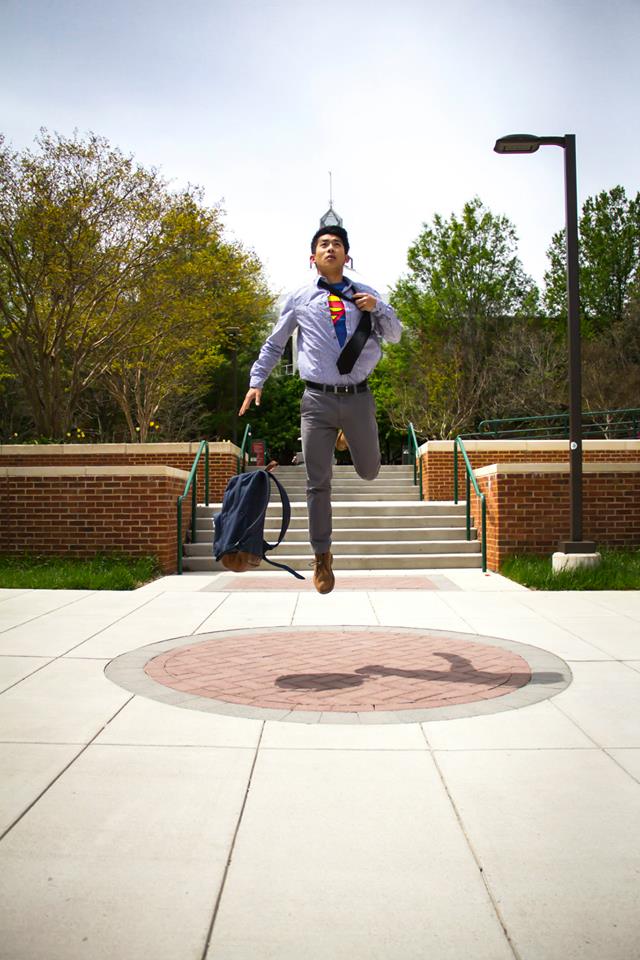
Jumping, with a high shutter speed allows the illusion of flight. Credit: Mediac Productions
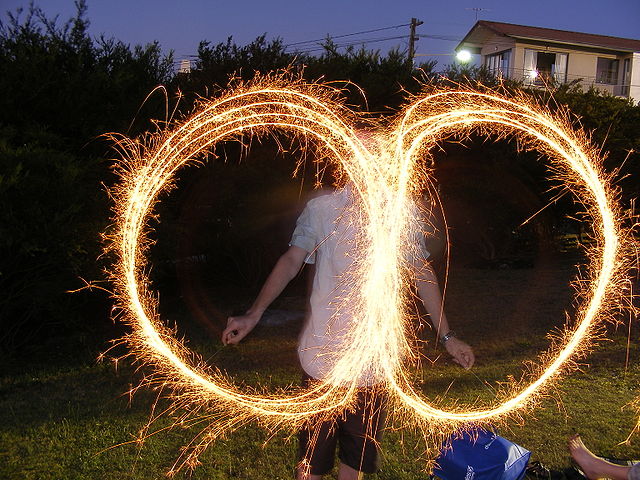
Slower shutter speed allows the sensor to be open longer means capturing more, and in this case the light trails.
Aperture is how much light is allowed to pass through the lens. The more you open it the more that can pass through. So think of this as the radius of the bucket the wider. This means it can capture more rain at a moment. Aperture is defined by f-stops, and although it is against intuition the higher f-stop usually means less light passing through, and vice-versa.
Aperture also has a direct effect on your Depth of Field which we discussed when we talked about Bokeh.
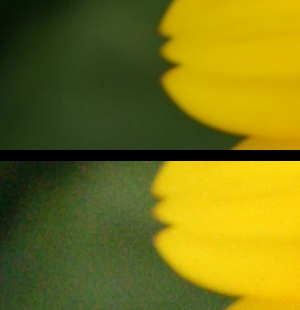
ISO is the sensitivity to light. So essentially increasing the ISO will make your image overall brighter, due to the fact that each lumen of light will be read much better by the sensor. So you can increase your ISO during lower light situations to make each bit of light count more. However, this is very important, it can possibly make your image more grainy as you increase the ISO because it increases the noise of the photo. This image shows what can happen if you increase the ISO too much.
ISO can be a great tool though, and fear of a grainy photo shouldn’t turn you away from experimenting with it. With practice and many cameras having LCD displays built-in you should be able to see what effects the ISO is having and where your sweet spot will be.
The only way to really understand anything in photography is through practice though! So go, and practice exposure, and of course you can always do your touch ups with iPiccy Photo Editor.